How to install EssentialsX to Your Minecraft Server
Iceline Hosting
November 29, 2022 • 10 min read
Minecraft servers, by default, don’t come with a huge variety of multiplayer-oriented commands, and most of them require more technical knowledge to make full use of them, essentially making hard cooperation on a big scale. Fortunately, some plugins expand this command list and EssentialsX might as well be the best one of them.
EssentialsX is a Minecraft Plugin that adds a whole variety of commands useful and essential for your Minecraft server, arranging from moderation tools to ban/mute/kick users to other functions such as setting a nickname, using colors in the chat, creating kits of items, teleporting to another player or create teleporting points called “warps” and “homes”. Not only that, but it also provides abbreviations on the existing commands, shortening commands like /gamemode 1 to /gm 1, or /time set day to /day. It also adds a variety of funny commands, like /fireball or /kittycannon!
You can configure EssentialsX, allowing you to put the restrictions that you want in the commands or assign them to different groups if you used it along with a plugin like LuckPerms.
The EssentialsX plugin has many modules that work as extensions, adding new features, such as EssentialsX discord, which is similar to Discord Core on Rust; EssentialsX Spawn, allowing you to create a spawn point for all the players on the server; Essentials X Protect to control a few settings in the world such as disabling explosions (essential for an SMP), and EssentialsX Chat to be able to use colors in the chat and set prefixes/suffixes (this also requires Vault)
The plugin should now be installed on your server! Don’t forget to restart the server for the folders to generate
EssentialsX adds a whole variety of commands to your server, we’ve categorized some of them:
/tpa Username - Sends a teleportation request to the specified user

/tpahere Username - Sends a teleportation request to your location to the specified user

/tpaccept, /tpadeny - Accepts or deny the request

/tp Username - Admin intended use, teleports you to the specified user without a request

/tphere - Admin intended use, teleports the specified user to your location without a request

/tpr - Teleports you to a random location
/msg Username message - Sends a private message to the specified user

/r message - Quick reply to the last message sent

/socialspy - Admin intended use, allows you to see all the private messages being sent

/mail send Username message - Sends an in-game mail to a specified user, even if he’s offline

/mail read Page Number - Shows a list of the mails sent to you

/mail clear Mail Number - Removes the specified mail, can also be used without specifying a number to remove all your emails
It will work as a remote replacement for most of the crafting stations of the game, some of these commands are already self-explanatory
/echest - Open an enderchest

/wb, /workbench - opens a crafting table

/anvil, /stonecutter, /smithingtable, /cartographytable, /loom
/feed - Fills your hunger bar

/heal - Heals you completely

/fly - Allows you to fly as in creative mode

/speed Number - Sets your speed to the specified value to a maximum of 10

/repair

/god - Makes you or another player (by specifying it like /god Player2) invulnerable, and your food bar won’t drop

/invsee Username - This allows you to see the specified user’s inventory
/nick - Changes your name to a specified nickname, it can have colors on it. By default, nicknames will have a ~ at the start, but this can be removed on the config.yml file by removing the nickname-prefix’s value
/hat - Sets the item held as a helmet

/thunder - Invokes a thunder in the cursor’s location

/beezooka, /nuke, /kittycannon - Explosions!
EssentialsX comes with its own kit system, which you could use to grant certain users any starting tools, or reusable kits with a cooldown. To create a kit, you’ll need to do the following:
/createkit Kit Name Delay in seconds For example:
/createkit Food 300This will create the Kit ‘Food’ which can be claimed once every 5 minutes.
/delkit Kit Name


You can set public teleporting locations for your players through the warp commands. Warps can be set to a different world
/setwarp Warp NamePlayers will then be able to go to that warp by using
/warp Warp NameWith EssentialsX Spawn, you can set a default spawn location for all your players. This can be done by going to the location you want and typing:
/setspawnYou can even set different spawn locations for different groups, use:
/setspawn Group NamePlayers can go to the spawn by typing /spawn
Jails can be useful as a moderation tool to punish players, it will send them to a specific point with the restrictions you want for a specified amount of time. These zones, combined with WorldGuard, can have their own rules to further punish the players.
In this example, we’ll create a Jail with the chat disabled:
/rg define Zone Name

We have called ours “publicjail”
/rg flag publicjail send-chat deny
/rg flag publicjail receive-chat deny
We have now disabled sending and receiving messages in the defined region, meaning that any jailed player will be essentially isolated from the server, we can also use other flags to secure our prison, for example, the enderpearl flag will allow us to disable enderpearl use in this area, and the blocked-cmds flag will allow you to set a list of disabled commands in this area
/rg flag publicjail enderpearl deny
/rg flag publicjail blocked-cmds /home,/spawn, ... (as many commands as you want)
Once our Jail zone has been secured, we can now create it.
/setjail Jail Name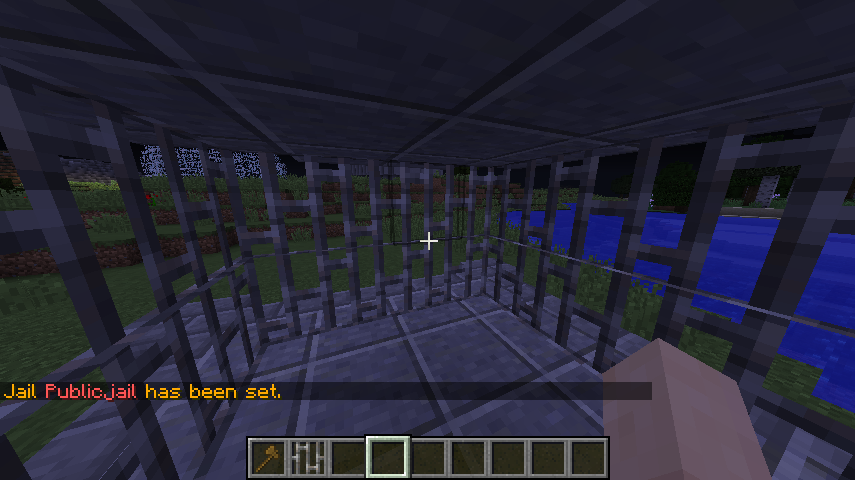
We have now set a Jail for our server and it can be used the next time you want to punish a player. A list of jails can be seen by using /jails
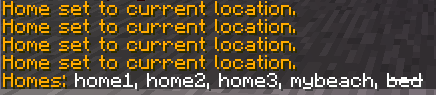
With EssentialsX, users will be able to set their personal teleportation points as ‘homes’, this can be done through the command:
/sethome Home NameYou can go to a specific home through:
/home Home NameIf the player has more than one home, typing /home will show a list of the available homes. You can modify the maximum number of homes per group on the config.yml file as explained below in the EssentialsX Configuration section
Thankfully, EssentialsX comes with its own moderation commands that will come in handy to maintain the order in our servers. There are a bunch of commands that we can categorize as:
/ban player reason - Ban a player for indefinite time with a reason

/banip player or ip address reason - Ban a player or an IP address with a reason/tempban player time duration reason - Temporarily ban a player for an specified amount of time.
/tempbanip player or ip address time duration reason - Temporarily bans the IP address of the specified player.You can use s for seconds, d for days, w for weeks, months for months, and y for years. For example:
/tempban Liam 2w Bang bang - will ban the player Liam for 2 weeks for the ‘Bang bang’ reason

/pardon, /pardonip, /unban, /unbanip - will unban a specified user, make sure to use the corresponding command (pardonip, unbanip for ip bans; pardon, unban for normal bans)/mute player time duration reason - Allows you to mute a specific player, it can be set to permanently if you don’t specify a time duration and a reason. Using the same command again on a muted player will unmute it/kick player reason - Kicks a player from the server with a specific reason
/kickall - Kick all players from the server except the command issuer/jail player jail name time duration - Sends a player to a previously made jail for an specific amount of time./jail Liam publicjail 2d - Will send the player Liam to the jail named ‘publicjail’ for 2 days.EssentialsX has its configuration file on which you’ll be able to customize a lot of things from the plugin, you can access it on the /essentials/ folder under the name of config.yml. Here are a few examples of the in-game changes you can make with it.
In the Homes section of the configuration file you’ll find a variable called sethome-multiple, here you’ll see a few groups and the maximum total of homes they can set with /sethome
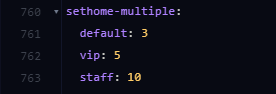
You can replace the values there with any amount you want and create your groups, just add a new line under it by using the following structure:
name of the group: number of homes
A new group has been created called ‘newgroup’ with a total of 6 maximum homes, you can now assign this permission to the rank of your choice by using a Permissions plugin like LuckPerms, here you can see our guide for it.
For the example above, make sure to give your groups the essentials.sethome.multiple, and essentials.sethome.multiple.newgroup permissions (replace ‘newgroup’ with the name of the group you created).
You can set a cooldown for the commands you want to prevent them from being spammed. Locate the variable command-cooldowns and add the commands followed by the amount of time in seconds. Follow this structure:
command: delay in secondsIn the example below we’ve set /heal cooldown to once every 2 minutes, and /tpa to 5 seconds

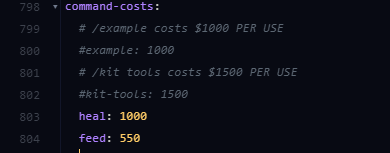
In the ‘Economy’ section, you can find the variable called ‘command-costs’, add the commands you want below it followed by the cost.
command: cost per useIn the example below we’ve set the command /heal to 1000 and /feed to 550
In the same ‘Economy’ section, you can see a variable called starting-balance whose value is 0, you can replace this value with the amount of your choice. In the example below we’ve set the amount to 100.

If you have EssentialsX Protect installed on the server, you can disable explosions, damage, and disable specific mobs as you wish.

Furthermore, you can disable mob spawns in the ‘Spawn’ section

Changing any of the values to true will prevent that specific mob from naturally spawning on your server
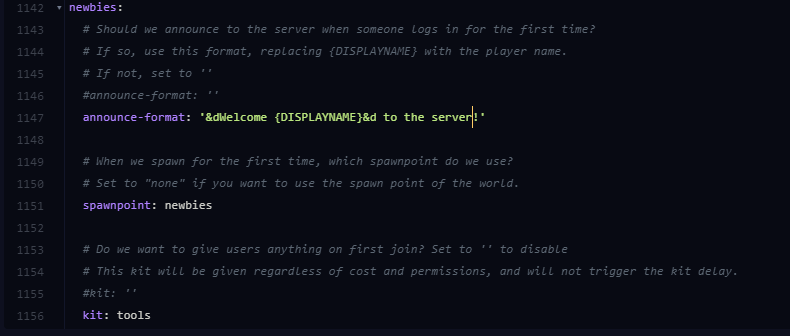
If you have installed EssentialsX Spawn, you can set an announcement in the chat each time a new player logs into the server, just edit the announce-format value to the message you want, and make sure to keep the {DISPLAYNAME} so it gets replaced by their usernames in-game.
You can also set their spawnpoints per group and give them an initial kit of your choice.
You can set most of the commands from EssentialsX as individual permissions for your players, you can find an extended and complete guide of all the EssentialsX permissions here
All the commands in this tutorial have been highlighted as an example, make sure to replace them with real values, furthermore, you can use /help EssentialsX in-game to get more information. If you are still having issues after this, feel free to contact Iceline Hosting’s support for further assistance.
Learn more about our Minecraft server hosting service at Iceline Hosting.