Here’s Our Guide on How to Make a GMOD Server [+ Best Practices]
Iceline Hosting
October 15, 2024 • 5 min read
Are you wondering how to set up a Garry’s Mod (GMOD) server? At Iceline Hosting, we understand that running your own server can seem intimidating at first.
However, we’re here to help simplify the process. Whether you aim to create a sandbox world for your friends or launch a community server, we’ll guide you through the steps.
At Iceline Hosting, we provide premium game server hosting, dedicated servers, web hosting, and DDoS protection, perfect for your GMOD server hosting.
With firsthand experience in supporting gaming communities, we consistently deliver exceptional performance and uptime. Our customers enjoy seamless server experiences backed by dependable customer support.
Garry’s Mod, known as GMOD, is a sandbox game that allows players to manipulate objects and experiment with physics. Since its release, GMOD has grown into a beloved platform for creative freedom, where players can build anything from mini-games to entire worlds.
The flexibility and open-ended nature of the game make it popular for both casual and professional gamers alike. If you’re looking to take your GMOD experience to the next level, setting up your server gives you full control over game modes, mods, and player management.
Now let’s dive into the steps to set up your GMOD server.
While it’s possible to run a GMOD server from your own machine, it requires substantial computing power and a strong internet connection. Instead of that, we recommend using a hosting service like Iceline Hosting to ensure stability and 24/7 uptime.

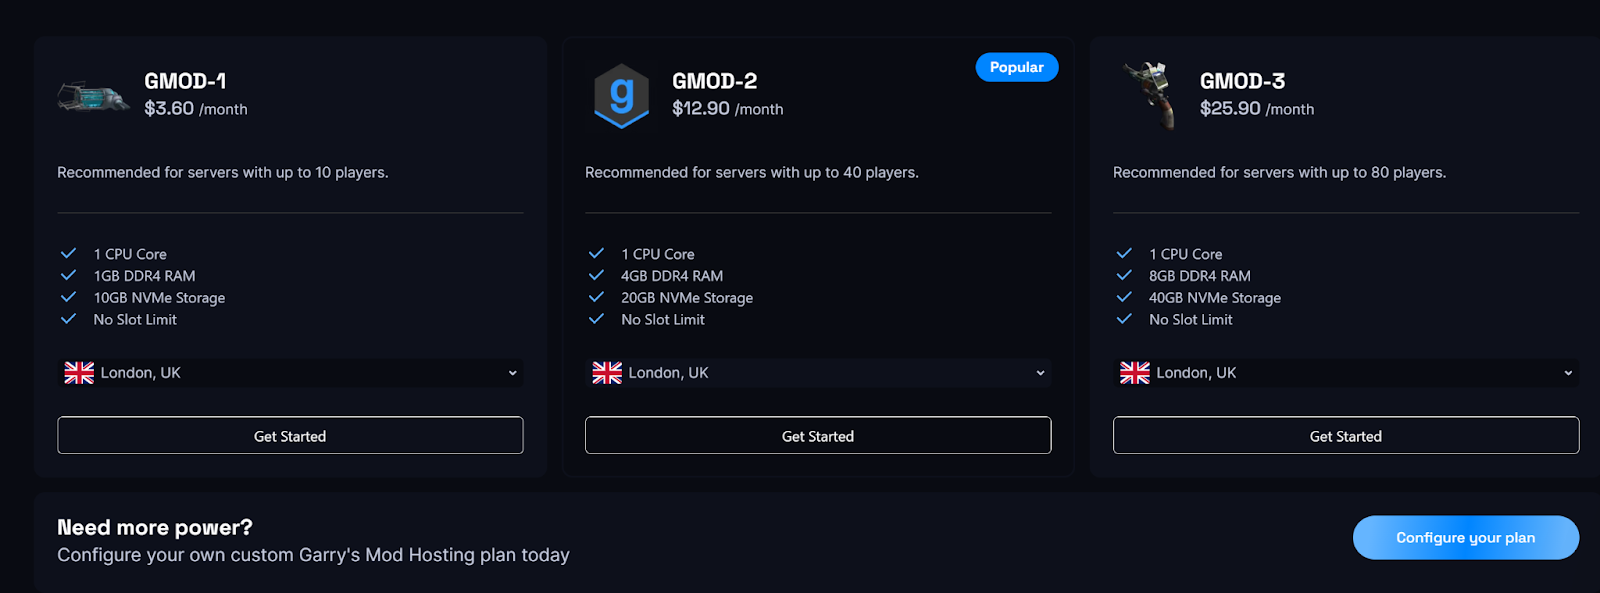
With Iceline Hosting, you’ll benefit from DDoS protection, robust customer support, and an easy-to-use control panel to manage your server. Follow these steps to get started:
Once you've selected the plan, begin the purchasing process by adding the server to your cart. The next step is to complete the payment. Then you’ll receive an email with the server details after your purchase is successful.
After this, log into your Iceline Hosting account. Navigate to the Control Panel section. This is typically based on TCAdmin or a similar platform and is designed to make server management easy. You can then locate your newly created Garry’s Mod server in the panel.
In the control panel, you should see an Install or Setup button for Garry's Mod. Click on it, and the game files will automatically be downloaded and installed on your server. After installation, you'll be able to start the server.
The next step is to customize your server. Configure your server settings by accessing the configuration file, or the server.cfg file via the file manager or the configuration section on the control panel.
Modify settings such as server name, max players, game modes, and more. Enable workshop mods, add them using the control panel’s mod management system. You can also add the Steam Workshop IDs directly into the workshop.lua file.
This is an optional step. You can add specific game modes or mods, Iceline Hosting makes it easy through the mod installer. Go to the File Manager or Mod Manager section.
Use the built-in Steam Workshop integration to search for mods or upload custom addons directly to the server's directory.
Also, you’ll need to set up admin rights. Use ULX Admin Mod to manage players and admin rights on your server. You can install ULX via the Workshop or upload the files manually. After this, configure the permissions for your admins by editing the ulx_groups.lua file.
Go back to the Control Panel and click Start to launch your GMOD server. Once running, you can use the server console to input commands and manage your server in real-time. The next step is to share your server.
Once your server is up, you’ll receive an IP address from Iceline Hosting. Share this IP with your friends or community so they can connect to the server. Players can join by typing connect [YourServerIP] in the GMOD console or finding the server in the in-game server browser if you've made it public.
Lastly, you can use the Iceline Control Panel to monitor server performance, handle restarts, and install updates. You can also set up automatic restarts or backups to ensure your server runs smoothly without issues.
After setting up your server, consider these best practices for optimal performance and player experience:
Setting up a GMOD server doesn’t have to be a complicated process, especially when using a hosting provider like Iceline Hosting. By following the steps outlined in this guide and implementing best practices, you’ll be well on your way to running a successful server for your friends or gaming community.
At Iceline Hosting, we offer the infrastructure, support, and tools needed to ensure your GMOD server runs at peak performance. Ready to get started? Sign up for Iceline Hosting today and elevate your Garry’s Mod experience!