How to Monetize Your Minecraft Server with Tebex
Iceline Hosting
November 29, 2022 • 7 min read
The Minecraft multiplayer mode had a huge evolution with the passing of the years, the multiple tools created by its community have proved to be really useful and have brought endless and amazing possibilities, like huge Minecraft servers capable of hosting hundreds of players, or even server networks, which are made of multiple servers with their own modalities and plugin and linked to the main server. While this may be good for players, it supposes an extra spend for their creators and developers, making it unsustainable in a lot of cases, fortunately, there are a few tools and platforms available for monetization, one of them being Tebex!
Tebex is a platform that will allow you to monetize your server through the creation of a web store linked to it, consequently, allowing you to sell elements and services inside the server to the users, or ask for donations. Tebex is without a doubt the best option for server monetization, and its history started years ago when it was known as Buycraft. Aside from Minecraft, Tebex also supports other games, such as Garry’s Mod, FiveM, CS:GO, and ARK:SE.
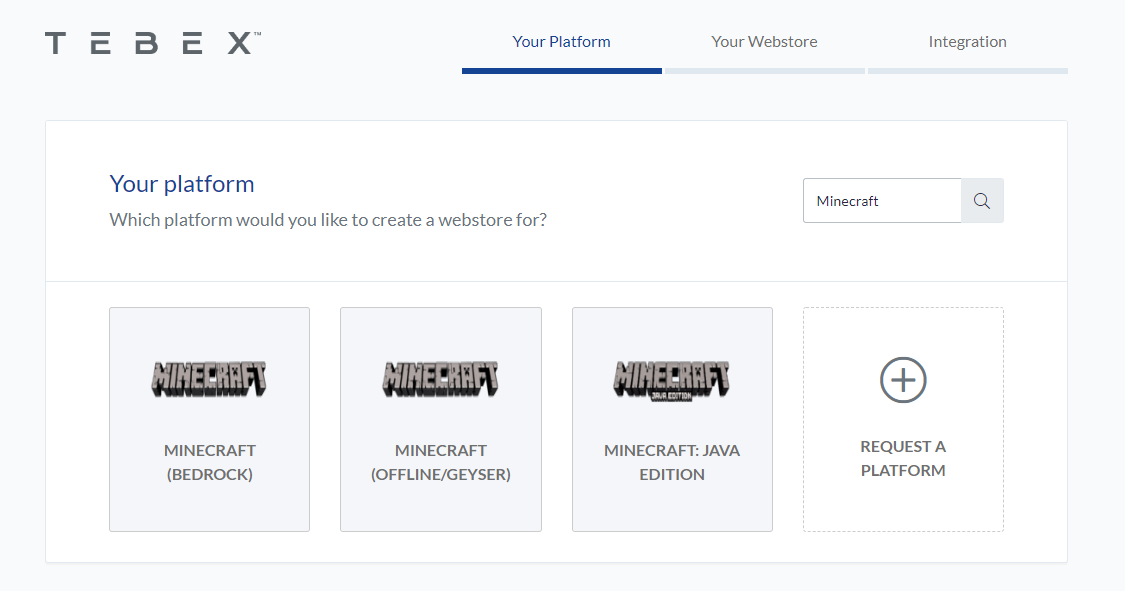
Compatible with Minecraft Bedrock and Java edition (both online and offline), and it has multiple integrations and plugins for the different server types available (Spigot, Sponge, Bungeecord, and even Forge!), bringing you the opportunity to monetize your server modality without any problems!
It has its own powerful web editor and a collection of themes, allowing you to customize your web store as you like, there are also plenty of payment methods available for your store and doesn’t require vast knowledge, meaning that you can get your web store up and running in just a few minutes!
Iceline Hosting is an official Tebex partner, so if you use our link you’ll have a 30-days free trial on the Plus plan!
In this guide, we’ll cover the aspects of

The next step will be installing the plugin on the server and linking it to the webstore.

You can verify if the plugin has been installed by typing /buycraft in the console
Once you’ve made sure that the plugin has been installed, you can now proceed with the linking


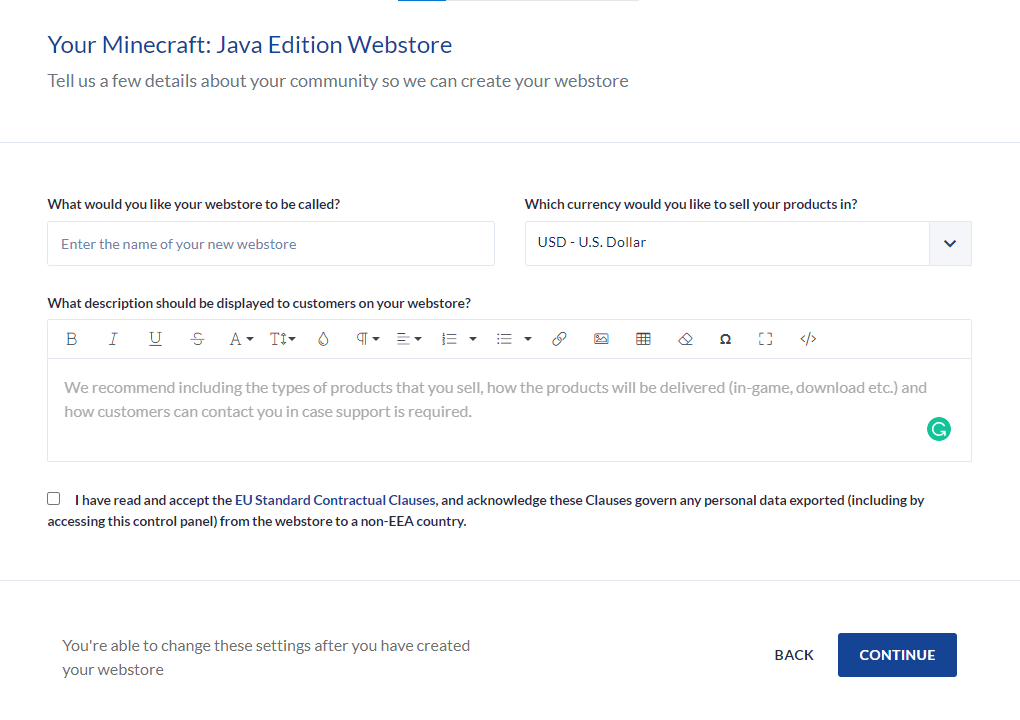
After clicking on Continue, you’ll see the following screen with a bunch of the available features through the Tebex panel, like uploading a logo, adding a team member, or changing the domain. We’ll now create a package (rank) for our shop

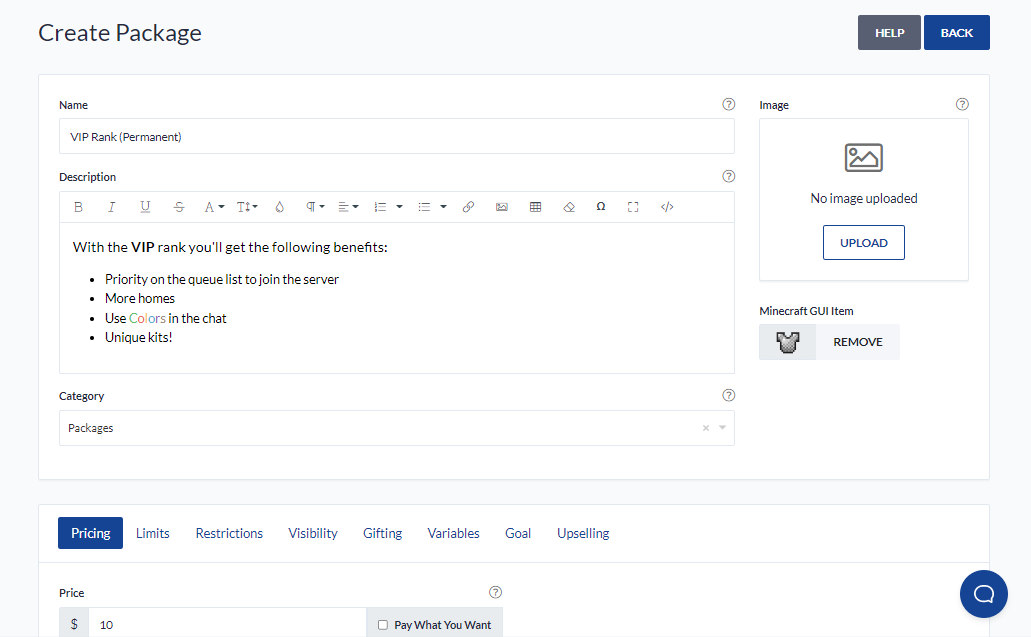
You can choose a name for the package, an image, a Minecraft icon for an in-game preview of the package through the plugin, a brief description of the product you’re selling, the price, limits, time duration of the package.. etc, and more importantly, the command or action that will be done once the customer purchases the package
In this example, we’ve put for sale the VIP rank we made on our LuckPerms tutorial, feel free to read it here!
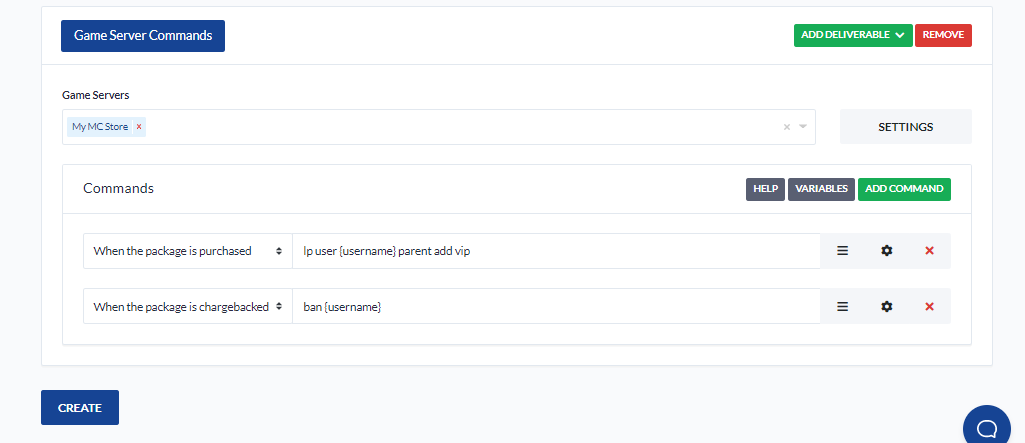
After setting the details for our package, the next step would be setting up the command that will be run for the player when the payment has been confirmed. We can do this in the next section of the package editor.

You can set a few different statements and the commands run on the server automatically by the system given the situation.
In this example, we’ve set the /lp user {username} parent add vip command to be run in the server once the package is purchased, and the /ban command as a measure if the user tries to chargeback the purchase
Categories are useful to sort the items you’ll be selling on your site, the process to create a Category is more or less the same as creating a product


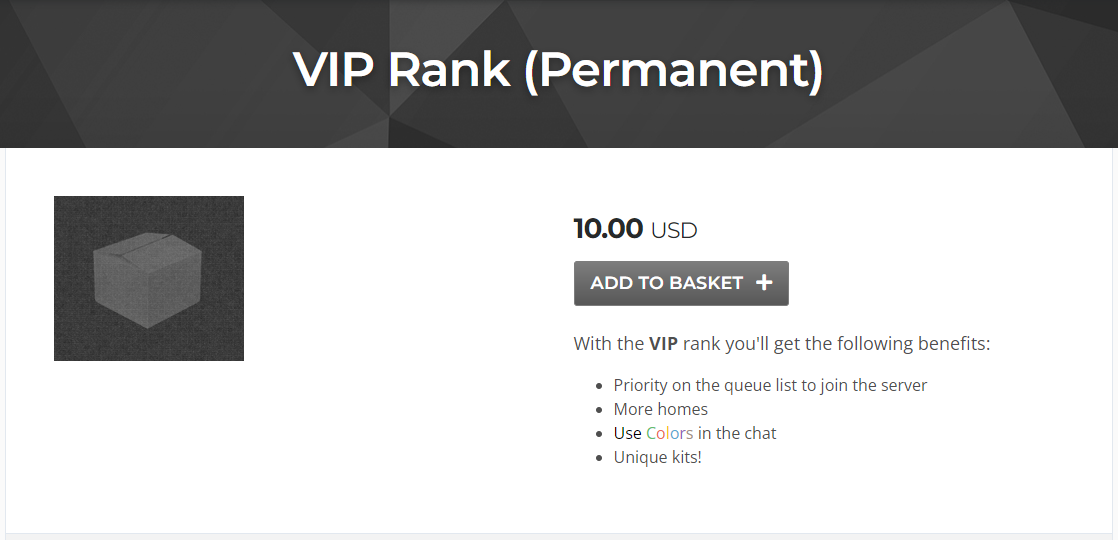
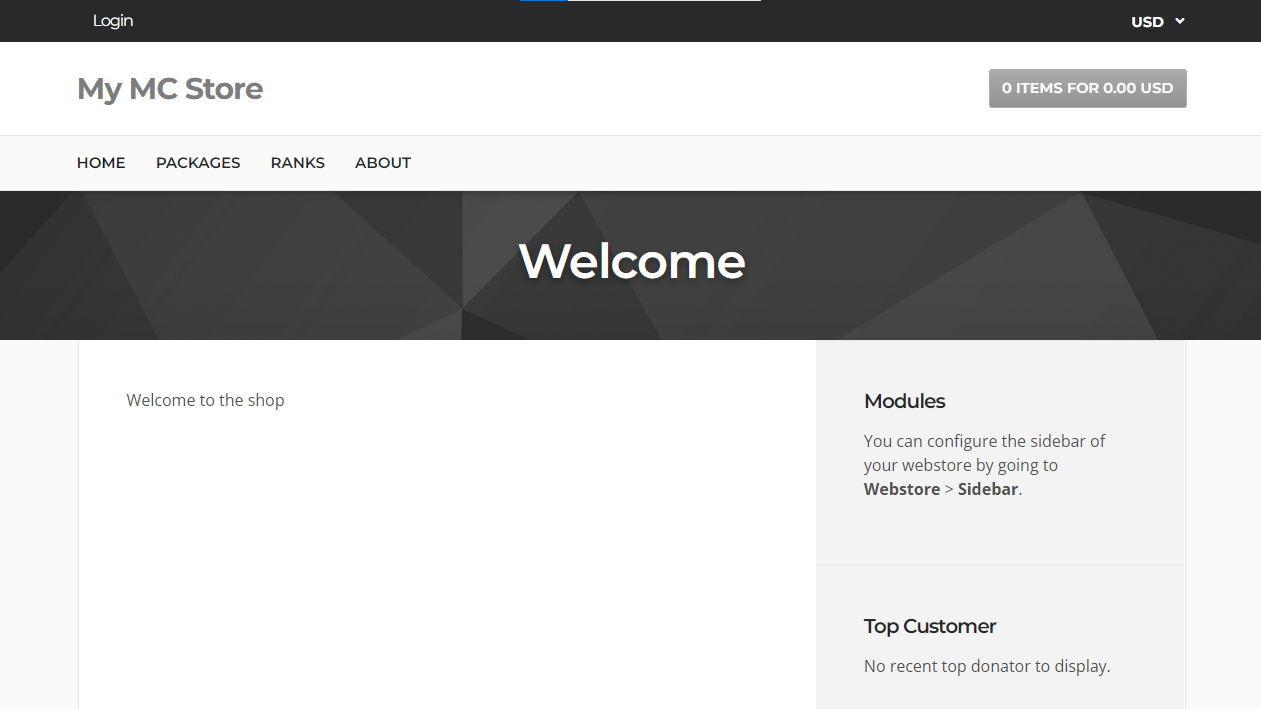
You can see it at any moment through the ‘View Webstore’ button at the top bar of your panel

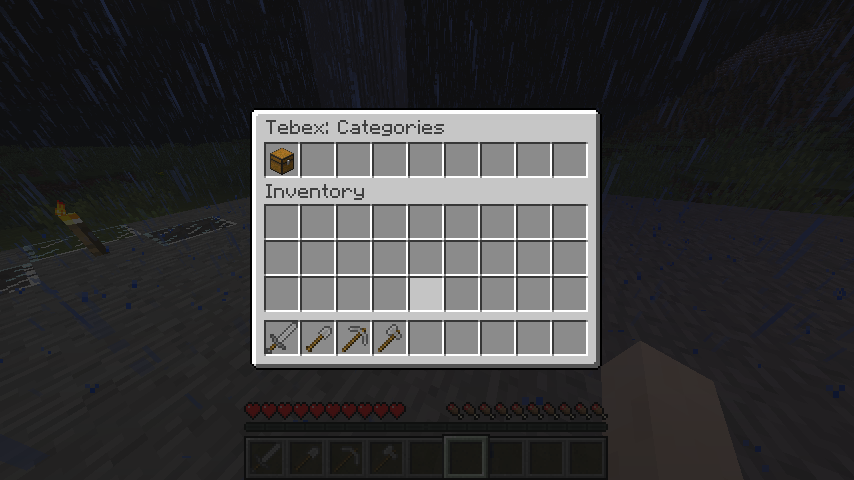
You can also access your webstore through the game server by typing /buy, this will let you see the available ranks on their respective categories in-game and buy them

That’s it! You’re now done with the very basic stuff to get your store up and running! Feel free to modify it as you wish and get creative with all the available features for you!
Are you interested in a Minecraft server? check our available plans for game hosting here!